| Month |
Demonstrator |
Subject |
|
January |
Steve Worchester |
Hollow Forms |
|
February |
Larry Walrath
|
Kel Mcnaughton's
Center Saver tools. |
|
March
|
Tom Farrell |
Metal Spinning on the
Wood Lathe |
|
April |
Alan Lacer |
Oval Turning Bowls or
Platters |
|
May |
Ken Rodgers |
Deep
Hollowing Techniques |
|
June
|
Glynn Cox |
Piercing
Demo |
|
July |
Delbert Dowdy |
Turning Items from
Antlers |
|
August |
Oren Zehner |
Turning
Spheres |
|
September |
Mike Jones |
Turning Negative Space |
|
October |
Randy Johnson |
Pen
Turning |
|
November
|
Fred Denke |
Three Corner Vessels |
|
December |
No Demonstrator |
Holiday Banquet. |
|
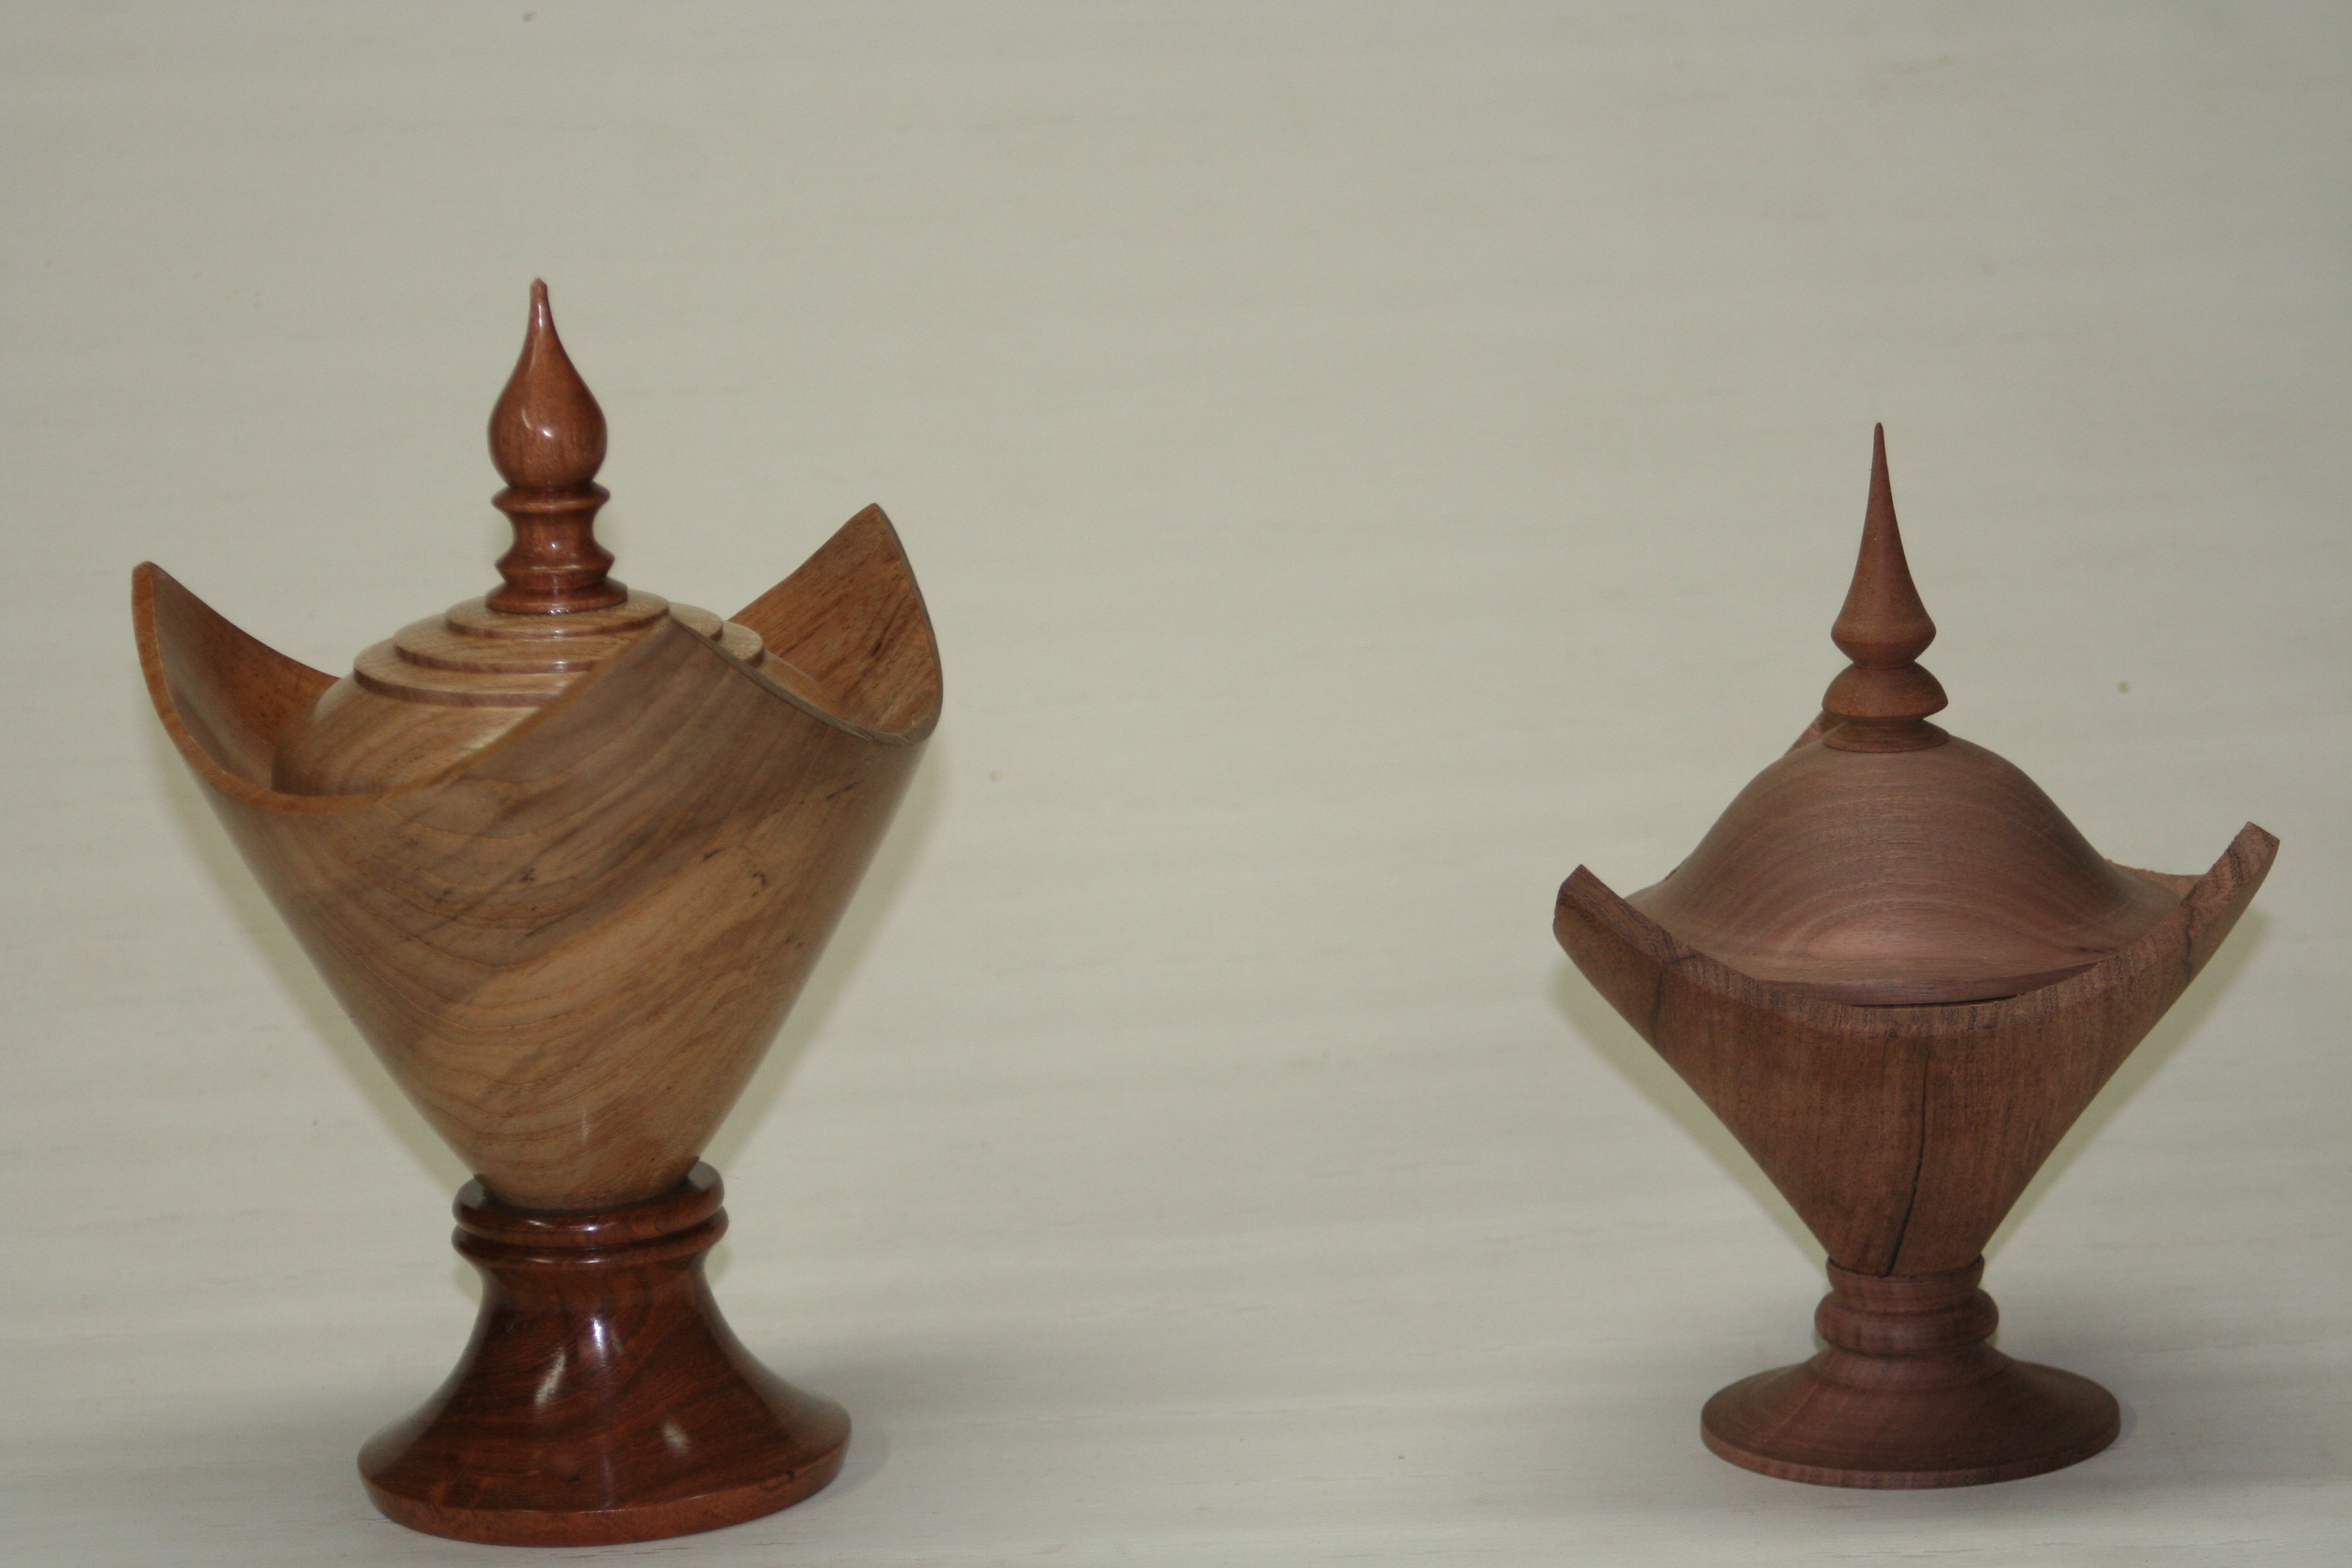
Nov
2009
Three Corner
Vessel
Demonstration for Woodturner’s of North Texas by
Fred Denke
Nov 19, 2009
 Our
November demonstrator is Fred Denke. He has been
turning for about 10 years and also is a member
of WNT for about the same time. He is a retired
engineer who spent 42 years in the aircraft
industry. After retiring in an effort to fill
his extra time he started woodturning and has
enjoyed the hobby or craft whichever you prefer.
To learn the best woodturning techniques he has
attended Our
November demonstrator is Fred Denke. He has been
turning for about 10 years and also is a member
of WNT for about the same time. He is a retired
engineer who spent 42 years in the aircraft
industry. After retiring in an effort to fill
his extra time he started woodturning and has
enjoyed the hobby or craft whichever you prefer.
To learn the best woodturning techniques he has
attended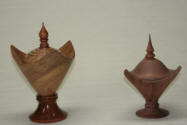 all
the hand-on spring WNT demonstrating. This
month Fred will demonstrate turning a three
winged vessel. This project starts with a square
block of wood. With some interesting cuts and
uses both between center turning and holding
with a scroll chuck and a jam chuck will be
used. all
the hand-on spring WNT demonstrating. This
month Fred will demonstrate turning a three
winged vessel. This project starts with a square
block of wood. With some interesting cuts and
uses both between center turning and holding
with a scroll chuck and a jam chuck will be
used.
This
project is somewhat of a advanced nature. The
cuts and turning tools required are standard.
The use of interrupted cuts and the extended use
of remounting the piece is more than use on most
turnings.
Demonstration
Handouts :
Hand
out 1
Hand
out 2
Oct
2009
Pen Turning
Demonstration for Woodturner’s of North Texas by
Randy Johnson
October 29, 2009
Click for Hand
Out
I believe that I joined the
club in October or November of 2004. I cannot
say that I have been turning since that date
since when I joined I had never turned anything
in my life. The first meeting I purchased two
raffle tickets and to my shock, I learn that if
I won I had to bring back a turned item. I had
never turned anything in my life, wait a minute,
I had already said that. The gods of “raffledom”
shined down on me and thankfully I won nothing,
story of my life. But I get ahead of myself, how
did I get involved in woodturning? It goes back
to a past president and a new Wood working store
coming to town, Rockler’s.
When I received a flyer in the mail that there
would be a pen turning at Rockler’s on a
Saturday, I ask my wife if she would like to go
and look, after all it was a free demonstration.
To make a long story short, she decided that
buying a Jet mini-lathe would be a great thing
to keep me from being such a couch potato. I
caution her that I would need more than just a
lathe to turn a wooden pen. She said no problem
and sure enough my first slimline only cost a
little less than $600. Do you know how many pens
you can buy for $600? Well this was in October
2004 when Mike Wallace introduced me to the
“Vortex” of woodturning. I have been buying
woodturning stuff ever since. My Vicmarc VM-100
chuck cost more than my mini-lathe and for some
unknown reason my tools got dull and I did not
have a way to sharpen them. The vortex had me
and I have yet to escape and the truth be told,
it is one of the most enjoyable hobbies that I
have ever taken up. I still have my mini and
have since added a Jet 1642, can you spell
V. O. R. T. E. X.
I still consider myself a
beginner to immediate turner and was fortunate
to have my first lesson with Alan Lacer this
year. I still turn pens from time to time but
have moved into boxes as one of my favorite
items to turn. If only it was easy to cut end
grain. That is my one area I am still trying to
improve. I just turned my first goblet, now I am
only three years behind Steve Ott. But don’t
worry Steve I don’t think I am going to catch
you. In the time that I have been with the club,
I have seen a subtle shift it what I believe are
many club members interest. When I first came to
the club it was mostly bowls, a lot of natural
edge bowls and big bowls (Jim Tanksley). That is
still the interest of many members but I believe
that spindle turning is increasing an area that
many members are interested. Part of the reason
for this is I believe is because of the ready
availability of good well built small lathes
that lend themselves to spindle turning. Pen
turning is nothing more than spindle turning and
the tools for spindle turning are not
necessarily the same as with bowl turning. Skews
and spindle roughing gouges just do not have a
place in most bowl turnings. Technique and tools
control are different for each.
Pen turning is where I
started in woodturning and will always have a
special place in my heart. Hopefully my
presentation will kindle an interest in you if
you have never turned a pen and maybe address
some issues you are having in your pen turning.
I hope to see you at the October meeting and
hopefully I may answer any questions you might
have.
Randy Johnson
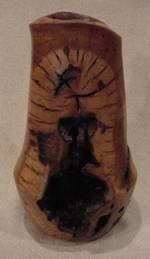
Sept
2009
Don’t Avoid
the Void
Demonstration for Woodturner’s of North Texas by
Mike Jones
September 24, 2009
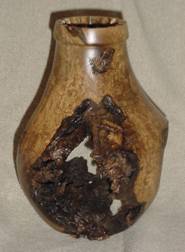
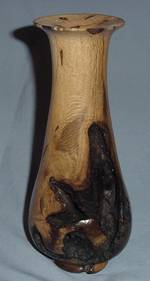
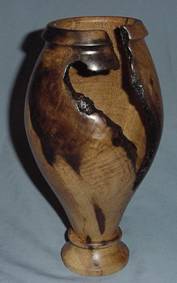
Turning wood with defects is almost something
that a turner cannot avoid. Using found wood,
wood donated by friends, or going and cutting
your own almost ensures that you’re going to end
up with wood in your turning pile that is less
than kiln-dried perfection. So what do you do
with those less than perfect specimens -
especially those with gaping holes or highly
contoured surfaces that aren’t straight 4x4s?
There are many strategies and skills that a
turner can use to deal with voids in wood being
turned. Some of those strategies include:
Walk Away – Sometimes the nature of the
void in the wood is such that there are no
viable options that allow you to turn the wood
safely. Please note that “safely” is a somewhat
relative term and is impacted by the turner’s
equipment, skill, experience, and the quality of
the turning blank. A turner should not turn
wood in which they feel unsafe to be around.
Better to be safe than sorry. Ask any turner in
our club for a scary story about the one that
got away.
Blank Trimming – One of the most obvious
ways to deal with voids is to minimize them or
remove them when preparing the blank for
turning. Either with a chainsaw or band saw,
many times you can isolate most, if not all, of
the void. But be careful, you may be cutting
away some of the nicest features the wood has to
offer.
Turn It Off – Sometimes the nature of the
blank lends itself to minimizing the void areas
and reducing its effect on the finished piece by
simply turning the void away on the lathe. This
is effectively accomplished by turning the piece
between centers, thus giving the turner a wide
variety of options for repositioning the piece
before more restrictive chucking methods are
employed.
Focus On It – To me, some woods look
boring when in a perfectly healthy state and
they only get interesting when they have
dramatic rot, water damage, insect infestation,
or impressive cracks and voids. In these cases,
choose to highlight the voids in the turning.
With a sense of balance between positive and
negative space, you will effectively use the
natural effect of the “imperfections” to create
a dramatic piece.
Turning Wood
with Voids Safely…
Special care needs to be taken when attempting
to turn a piece of wood with considerable voids.
Some of the items mentioned below are good to
observe during any type of turning, others are
more common only with defective wood.
Face Protection – Notice I didn’t say
“eye” protection! When turning wood that
contains defects, the chance of encountering or
causing loose debris is almost a guarantee.
Simple eye protection is not enough. Get your
whole face covered. Even a smock that comes up
around the neck is a helpful protection from
flying bark, rotted wood, or dirt clods.
Hand Protection – Since much of your
cutting will be through bark, rotted wood, or
around sharp cracked areas, wearing quality
turning gloves is a good idea as debris leaving
the lathe near your hands can be pretty brutal.
I use an open fingered glove that allows good
“feel” and control of the tools while protecting
the majority of my hand.
Lung Protection – Dust is always a
threat to the turner and we need to continually
remind ourselves of this nuisance. However,
when turning decomposing wood adds the
additional factor that harmful and irritating
fungus spores and bacteria can be inhaled and
severely impact the turner. Use appropriate
respiration protection during all turning.
Loose Clothing/Long Hair – It is never a
good idea to wear loose hair or articles of
clothing (unfastened arm sleeves, un-tucked
shirt tails, etc.) around turning wood, as the
chances of the material being caught in the
piece is likely. This is especially true when
the turning blank has uneven surfaces and voids
that sometimes attract airflow into and through
the turning wood. Fasten long hair into a cap
and secure sleeves and shirttails before
turning.
Sharp Tools – Since much of the turning
in wood with voids involves making interrupted
cuts where first wood and then void is presented
to the tool as the piece rotates, it is
extremely important to use well-sharpened tools.
A sharp tool cuts easier and requires less
pressure to get a shaving. When a tool gets
dull, additional pressure is required for it to
cut. This additional pressure has the
devastating effect of pushing the tool into the
void and causing dramatic catches. Sharp tools
and an easy touch are good safety ideas for any
turning project but especially with voids.
Allergy Protection – Many turners realize
that there are specific woods that cause
allergic reactions when they use the material.
Please learn what woods adversely affect you
and take appropriate precautions.
Vibration – When turning wood with
voids, unwanted vibration is inevitable. Make
sure your lathe is anchored as best you can
before turning. Never turn your lathe on at an
unsafe speed. The vibration can rip the piece
from your lathe in the blink of an eye. For
those with adjustable speed controls, start off
with the piece stopped and increase the speed to
a comfortable turning speed. Sometimes one
needs to speed up or “spin past” a place of
destructive harmonics. This is when the
rotation cycles and the mass of the wood work
with each other to create the most intense
vibration. Sometimes a slight increase the
turning speed will get past this amplification
of vibration. But be careful! Higher speeds
also mean greater centrifugal forces that can
cause the project to leave the lathe without
your permission to do so.
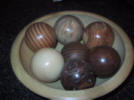
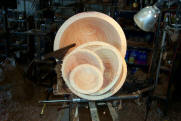
Examples of turnings with voids…
|
|
|
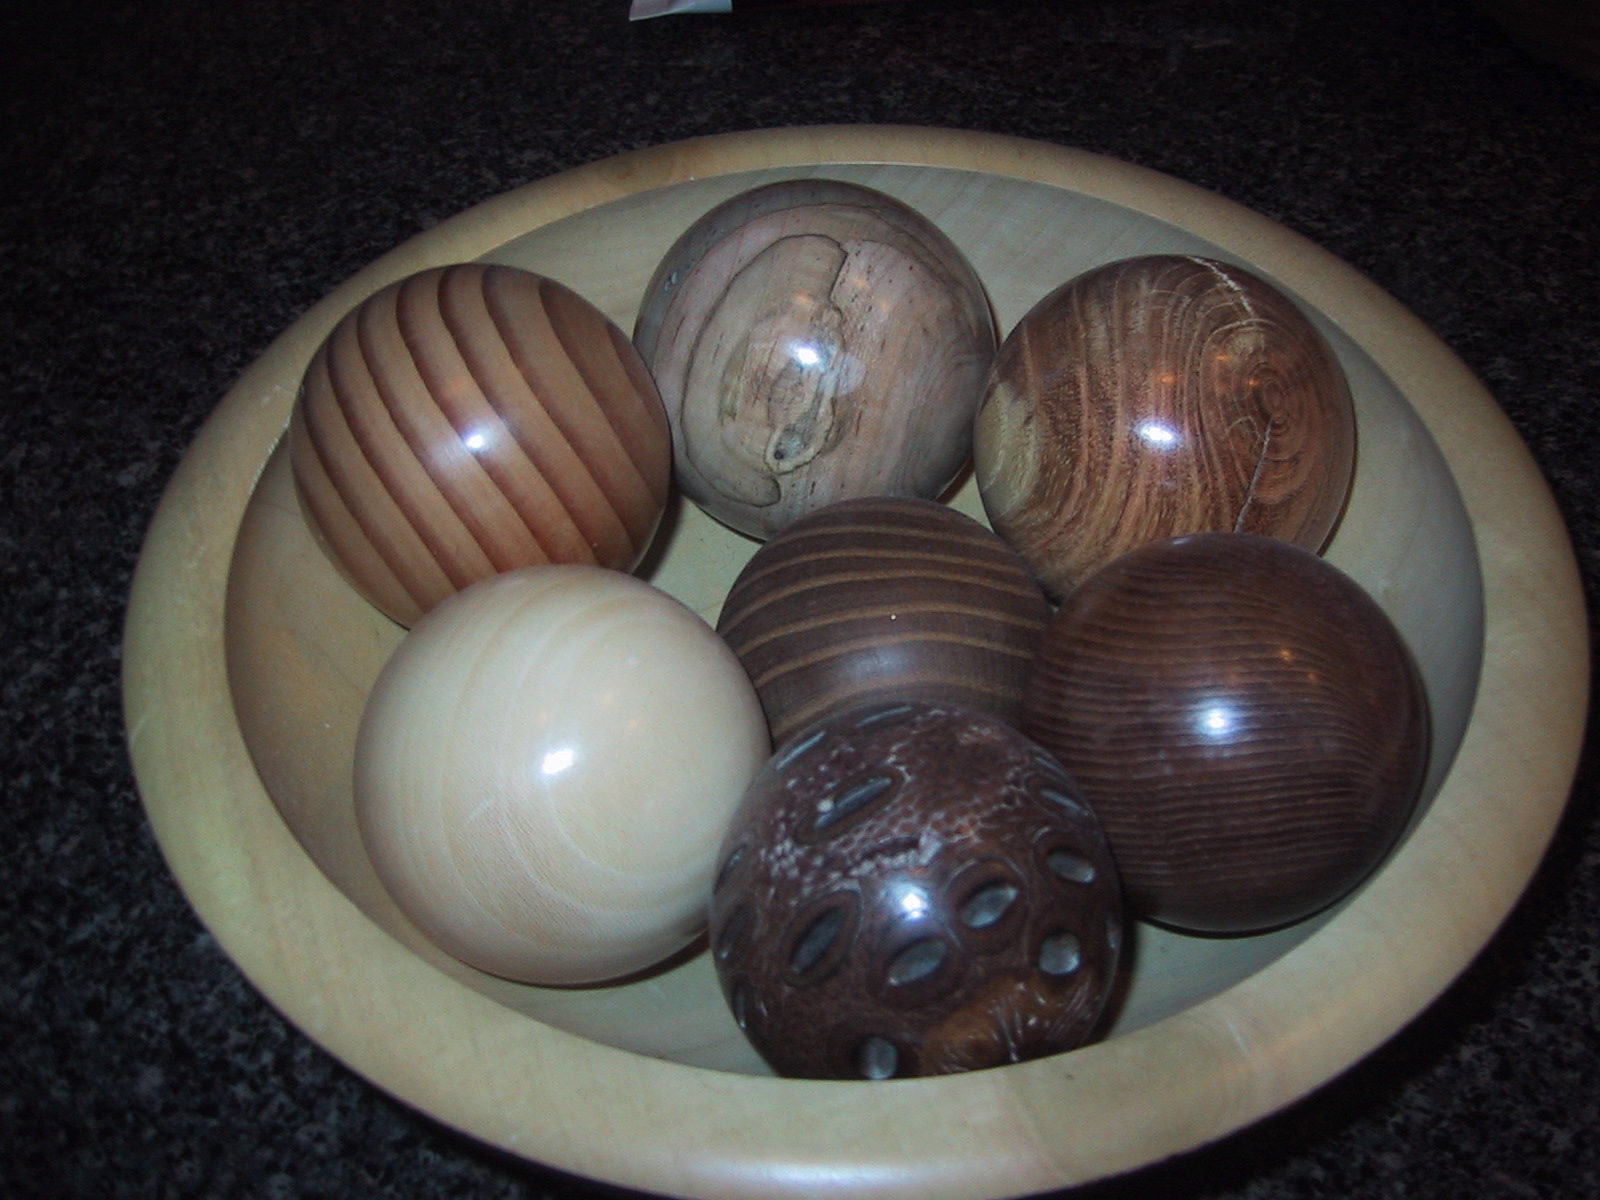
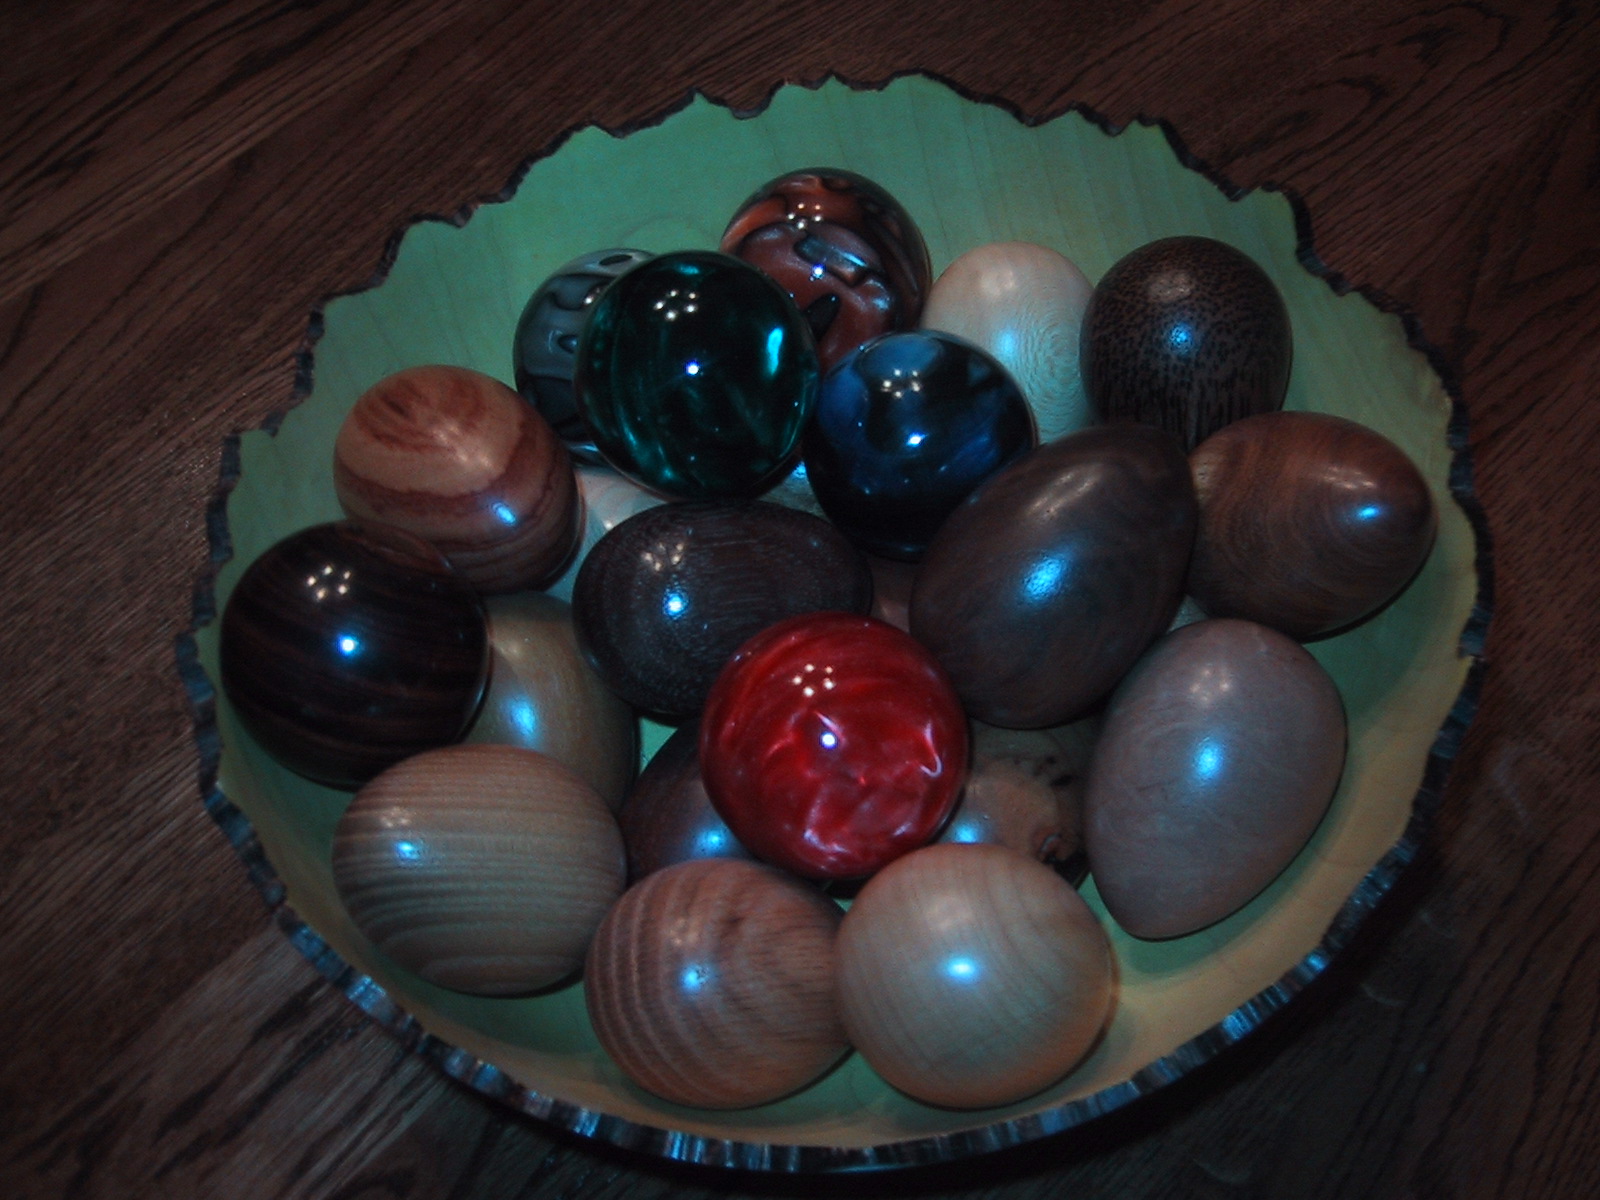
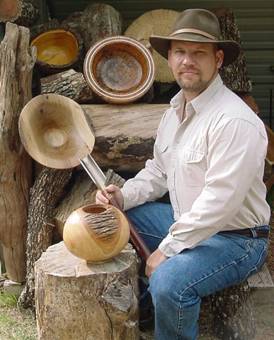
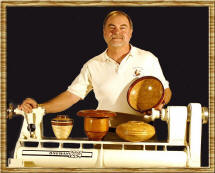
August
2009
Oren Zehner
Spheres
Hand-out
for demo:
Click Here
  My
name is Oren Zehner. I was born in Tonkawa, OK
where I attended Northern Oklahoma College and
finished my teaching degree at Oklahoma State
University in Stillwater, OK. I started turning
in high school and continued while I taught for
29 years both in the public and vocational
schools with classes in woodworking, drafting,
cabinetmaking and woodturning for high school
students and adults. Once retired from teaching
I sought out another career in Microtechnology
and Watchmaking. Currently I am employed with
Richemont North America in Ft. Worth in the
Quality Control Department for Cartier, IWC,
Baume and Mercier, Piaget and Panerai watches. My
name is Oren Zehner. I was born in Tonkawa, OK
where I attended Northern Oklahoma College and
finished my teaching degree at Oklahoma State
University in Stillwater, OK. I started turning
in high school and continued while I taught for
29 years both in the public and vocational
schools with classes in woodworking, drafting,
cabinetmaking and woodturning for high school
students and adults. Once retired from teaching
I sought out another career in Microtechnology
and Watchmaking. Currently I am employed with
Richemont North America in Ft. Worth in the
Quality Control Department for Cartier, IWC,
Baume and Mercier, Piaget and Panerai watches.
When I graduated with my second career we moved
from Oklahoma and settled in Roanoke and one of
the requirements of the house was a three car
garage where I would have a place for my
lathes. The three lathes I own include a
Vicmarc Mini, One-Way 1224 with extension and a
VB36 bowl lathe. I do not specialize in any
particular turning style although I like turning
miniatures and that was what actually peaked my
interest in a watch making career.
 I
am a current member of the Northeastern Oklahoma
Woodturners Association where I presided as
president, vice-president, treasurer and
demonstrator for many years. Recently I became
a member of the Golden Triangle Woodturners and
have been a member of the AAW for many years.
If you have ever watched the Woodturning
Workshop hosted by Tim Yoder from Tulsa, OK you
might have seen me on the television. I have
attended several AAW and SWAT symposiums and
numerous seminars which include classes taught
by John Jordan, Ron Flemming, Frank Sudol, Trent
Bosch, etc. I
am a current member of the Northeastern Oklahoma
Woodturners Association where I presided as
president, vice-president, treasurer and
demonstrator for many years. Recently I became
a member of the Golden Triangle Woodturners and
have been a member of the AAW for many years.
If you have ever watched the Woodturning
Workshop hosted by Tim Yoder from Tulsa, OK you
might have seen me on the television. I have
attended several AAW and SWAT symposiums and
numerous seminars which include classes taught
by John Jordan, Ron Flemming, Frank Sudol, Trent
Bosch, etc.
 Turning
spheres started out with a friend of mine, Larry
Elizondo, where we would gather unique and
different types of wood, share with each other
and turn spheres. This developed into a unique
wood collection. The standing joke was “who had
the biggest sphere, the smallest sphere and the
most spheres”. You can see from this how things
can get out of control. To turn the spheres we
had to develop holding devises to fit into the
headstock and tailstock so another friend, Larry
Anderson, was brought in to help develop and
create ideas for us to use. This lead to a club
demonstration in which the three of us put on
for the Tulsa club. The next stop on this
adventure was on the road where Oren did a
demonstration for the Oklahoma City club and the
culmination was being on the Woodturning
Workshop and hosted by Tim Yoder. The
Woodturning Workshop is a syndicated program
presented on PBS. Turning
spheres started out with a friend of mine, Larry
Elizondo, where we would gather unique and
different types of wood, share with each other
and turn spheres. This developed into a unique
wood collection. The standing joke was “who had
the biggest sphere, the smallest sphere and the
most spheres”. You can see from this how things
can get out of control. To turn the spheres we
had to develop holding devises to fit into the
headstock and tailstock so another friend, Larry
Anderson, was brought in to help develop and
create ideas for us to use. This lead to a club
demonstration in which the three of us put on
for the Tulsa club. The next stop on this
adventure was on the road where Oren did a
demonstration for the Oklahoma City club and the
culmination was being on the Woodturning
Workshop and hosted by Tim Yoder. The
Woodturning Workshop is a syndicated program
presented on PBS.
|
|
|
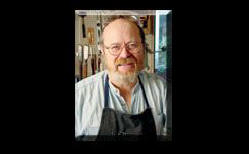
July
2009
Delbert Dowdy
Antler
Demo Handout
 Antler
is a fascinating and easy material to turn. It
is also a good medium to use when making small
objects such as pens, key chains, and
kaleidoscopes. Items made with antler can hold
special appeal with many people, especially
hunters. How many people do you know that have a
deer antler kaleidoscope? Although antler turns
similar to wood, t Antler
is a fascinating and easy material to turn. It
is also a good medium to use when making small
objects such as pens, key chains, and
kaleidoscopes. Items made with antler can hold
special appeal with many people, especially
hunters. How many people do you know that have a
deer antler kaleidoscope? Although antler turns
similar to wood, t here
are some special techniques that are helpful to
know. This demonstration will show how to make a
pen combining a bullet and deer antler. We will
also discuss how to make modifications when
increasing the size of an object. here
are some special techniques that are helpful to
know. This demonstration will show how to make a
pen combining a bullet and deer antler. We will
also discuss how to make modifications when
increasing the size of an object.
We will briefly cover how to drill, shorten,
prepare and size the inner tube, and shine the
bullet. Moving on to the qualities of antler, we
will discuss special ways to drill the antler,
install the copper tube, and size the antler to
length. Turning antler is similar to turning
wood but porous antler material, which is
common, must be treated after turning.
Drilling holes for the kaleidoscope can be
difficult. My technique of drilling holes for
the kaleidoscope is to drill a small hole, turn
the antler round, mount it in a chuck, drill a
larger center hole, and finally drill a larger
end hole.
Delbert Dowdy
www.Genevaconcepts.com |
|
|
June
2009
Glynn Cox
Piercing Demo
My name is Glynn Cox and I am member of the Woodturners of North Texas
and Golden Triangle Woodturners clubs. I
retired 5 years ago from a 37 year career with
Bell Helicopter where I was in charge of
Customizing Engineering.
Several years
ago I did a little wood gouging but not until I
retired and told myself that I was going to
truly learn to “turn” did I actually produce
anything to be proud of. I have
specialized in turning bowls and prefer using
rough, figured or burl wood. I generally
like to keep my turnings in their natural state
without any surface embellishments.
While looking at
the Instant Gallery at SWAT in 2007 I saw some
pieces that had been pierced. Some were
quite well done and others no so well but I
thought I might like to try my hand at it.
I used my Dremel tool with some success then
checked out the available information on the
internet. I found that there were some
very expensive tools available in the form of
high speed dental handpieces and straight craft
handpieces all in the $400+ range. Being
the frugal engineer and
consummate experimenter I built a system from
surplus parts for about $100.
I use this
system to produce pierced areas on my turnings,
some of which I have brought to the club
meetings.
John Horn has
asked me to do a demonstration on piercing.
Watching someone do piercing for an hour is like
watching paint dry or grass grow so I thought it
would be beneficial to demonstrate the
construction of a piercing tool setup using low
cost components and talk about how each works
within the system. I will then attempt to
turn a thin wall bowl and do some basic
piercing. |
|
|
|
May
2009
Ken Rodgers
Deep
Hollowing
I plan to
demonstrate some deep hollowing
techniques, including the use of a Sorby-type
arm brace with hooker tool versus the
use of a stabilizer bar w/laser pointer.
I will also show hollowing through a
narrow opening versus using a wider
opening. These techniques will allow
hollowing a vase through a relatively
large opening and then the addition a
rim that makes it appear that the
hollowing was done through a small
opening.
Lately I
have been making pierced masks and if
time permits, I will show some aspects
of how those are made from a
thin-wall end-grain vase.
Ken R
|
|
|
April 2009
Alan Lacer
OVAL
TURNING DEMO WITH ALAN LACER
 In
this evening demo Alan will share with you
the unique world of oval turning.
First a little background. 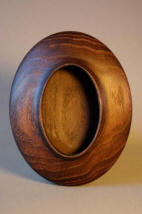
It is very likely that Leonardo de Vinci
(1452-1519) drew the plans for the first
oval turning chuck.
It is a question of math and geometry (one
of de Vincis’ strong points) to achieve an
elliptical spinning orbit on a wood lathe.
Whether he was the first to describe
such a process it is clear that oval turning
starts appearing in the 1500’s, quite
popular in the 17th and 18th
centuries and probably reached its peak in
the 19th century--especially with
the interest in oval picture frames.
One American company, the Old Schwamb
Mill near Boston, keeps this tradition alive
even today with its production of oval
picture frames
(although on a limited basis).
Fast
forward to the 21st century.
Oval turning had almost been
forgotten and certainly little seen, a
modern version of the oval chuck appeared
recently which allows turners to produce
work that is a break from circles.
Overcoming some of the problems of
older chucks—such a balance, changing the
dimensions of the ellipse, adapting to
different lathes, noise level an safety
issues—is this new chuck or, as the makers
like to describe it, an “oval turning
device.” Designed
by Professor Johannes Volmer of Germany and
produced by Vicmarc in Australia, this is an
amazing piece of engineering.
 The
chuck is only part of the story.
Turning ovals is quite different from
working with circles.
First, there is no individual center point
as in normal turning.
What occurs is a horizontal plane where all
cuts and sanding activities must occur.
Outside of this plane is another oval
shape; working outside of the true plane
results in a smeared or irregular shape.
Some turners work with a trapped tool
system that is setup to stay within the
confines of that plane.
Other turners work free-hand but use a laser
level that throws a horizontal line to “show
the way.” And
some turners feel the correct position and
see the stable part of the oval within a
blurred image—the turning then is very much
like ordinary circle turning.
Alan will bring examples of plates, platters
and even hollow-turned oval vessels that he
has been pioneering.
In the demo he will take you through most of
the process in making an oval bowl.
To read up on oval turning go to the
following sites:
www.alanlacer.com
(Alan has an article he wrote on oval
turning at the Old Schwamb Mill )
|
|
|
March
2009
Metal Spinning
Presented by: Tom Farrell
Reported by: John I. Giem
Tom Farrell
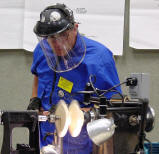
Medlow, TX
tfarrellsrwa@yahoo.com
(806) 548-4621
At the August 7, 2008, meeting
of the Rocky Mountain Woodturners, Tom Farrell
presented a demonstration on Metal Spinning. As
demonstrated by Tom, metal spinning is performed on
a standard wood lathe with a few additional tools
and forms most of which can be shop fabricated.
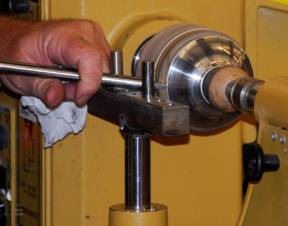
In the above diagram, one can
see the basic elements needed for holding and
shaping the sheetmetal disk. Mounted on the
headstock is the mandrel (chuck, form, buck) upon
which the metal is to be spun or formed. The metal
disk (2) is held against the mandrel by the Back
Block (3) which is mounted on a live center (4).The
mating surfaces of the mandrel and the back block
have matching complementary surface shapes.
By using a live center with
interchangeable tips, one can make custom shaped
back blocks to accommodate each situation.
The mandrel is turned from wood
to create the internal shape of the part to be spun.
You should use a wood that has fine uniform grain
without hard and soft spots. Any imperfections in
the surface of the mandrel will also show up on the
surface of the final spun metal shape. Some woods,
such as olive and pine have hard and soft areas
corresponding to spring and fall growth. These hard
and soft areas may show up as ripples in the final
spun piece. There are several alternatives to wood
for mandrels. Tom has had good results from using
Corian, the same material used for counter tops.
Often scraps are available from Installers but you
may need to glue several layers together to get the
size you need.
When designing and turning your
mandrel, be sure that the diameter of the form never
decreases when moving from right to left, the
direction the material is spun. If a smaller
diameter is encountered, the metal will flow into it
thus locking the metal onto the form. (Some times
this technique is used to make a weighted lamp
base.)
The metals used for spinning
include: pewter, aluminum, copper, brass, silver,
stainless steel, and cold rolled steel. For the
demo, Tom used the aluminum alloy 1100-0 which was
16 gauge or 0.050 inches thick.
The tool used by Tom to form
the aluminum onto the mandrel is called a
Combination Spinning Tool or sometimes called a
Finger Tool. A large radius is need on both the top
and bottom of the tool. Its basic shape is shown in
the diagram above. He made his own Finger Tool out
of 4140 alloy round bar stock about 18 inches long.
(Drill stem sucker rod also works well. )It was
mounted in an old shovel handle giving it a total
length of around four feet. This long length is
necessary to allow placing the non-working end under
his arm pit so that his whole body could be used to
leverage the tool during the spinning process.
He made his own tool rest from
stock steel about one inch square and one foot long.
It has a series of holes spaced along the top that
are fitted with a pair of movable steel pins. In
usage, Tom uses the pins to leverage the finger tool
against the spinning aluminum.
While spinning the metal, it
must be lubricated to prevent galling or damage.
There are a lot of different recommendations as to
what should be used but Tom has found that one of
the best and yet economical lubricants is the wax
from a toilet bowl seal obtained from your local
hardware store. (Be sure to get an unused one.)
For first projects, Tom
recommends that the mandrel should be designed to
make an object that is twice as wide as it is high.
This shows Tom using the finger
tool and tool rest to flow the metal down and around
the mandrel.
 The
top of the bowl is trimmed up using a trimming tool,
a steel bar fitted with a 1/4 steel lathe cutting
tool. Another shop made tool. [I found a box of five
carbide tipped 1/4”cutting tools at Harbor Freight
for around $5. JIG]. The
top of the bowl is trimmed up using a trimming tool,
a steel bar fitted with a 1/4 steel lathe cutting
tool. Another shop made tool. [I found a box of five
carbide tipped 1/4”cutting tools at Harbor Freight
for around $5. JIG].
The bowl is then reversed and
final trimming of the top is performed
When spinning the metal, use
less pressure as you move further out on the
mandrel. Too much pressure too far out on the
mandrel can cause cockling (wrinkling of the metal).
If the cockling is not too bad, the end of the
finger tool can be used to lift up the edge and move
it slightly back toward the tailstock. Then using a
backing stick in your left hand, put it under the
cockled metal and use the finger tool to iron out
the wrinkles. Yes, you are using the backing stick
in the left hand and the finger tool in the right
hand at the same time. Both tools are across the
toolrest prying against the pivot pins trying to
iron out your mistake. And yes, you will be very
busy at this time. If is not cockled too bad and if
you are lucky (good) you will be able to salvage the
work, otherwise start over.
After spinning the bowl, Tom
sprayed it with WD-40 and wiped it down with a rag
to remove all of the wax lubricant.
There are a lot of different
style tools available for metal spinning and a lot
of opportunities for our incorporating it into our
woodturning.
References given by Tom:
Book: The Art of Metal Spinning: A Step by Step
Guide to Hand Spinning By Paul G. Wiley, Available
from Amazon.com for about $17.00.
Terry Tynan is a professional
metal spinner with over 20 years of experience. He
is the host of a web site named
http://www.metalspinningworkshop.com. The
phone number for the Metal Spinning Workshop is
610-277-7460
Metal spinning tools, tool
rests, metal disks, videos and polishing compounds
are available from
http://www.cuttingedgetools.com/
Tom
also handed out a ‘Metal Spinning Tutorial’ he
downloaded from the internet.
V1.0
Metal Spinning
P e t e r R u b i n F l e t t e r •perf• 11.10.95, I
found it at:
http://www.fdp.nu/mikelldevice/spinning.pdf
|
|
|
February 2009
Larry Walrath
Larry is wood turner, engineer, singer,
trumpeter, photographer, husband, father. He
comes from a family of wood artists; his father
and grandfather both made furniture and turned
wood. His ancestors include wood artist from the
Alsace-Lorraine area in the black forest who
emigrated to America in 1712.
Larry has been turning wood since a child. A
member of the American Association of
Woodturners, Central Texas Woodturners and
Brazos Valley Woodturners . Larry teaches wood
turning lessons at his studio in Round Rock,
Texas. His work is displayed in local shops and
galleries. On the web at
http://www.larrywalrath.com
 He
will be giving a demonstration on hollowing
bowls from half logs using Kel Mcnaughton's
Center Saver tools. He
will be giving a demonstration on hollowing
bowls from half logs using Kel Mcnaughton's
Center Saver tools.
Teaser:Being able to cut multiple bowls from a
single wood blank offers numerous advantages
including increased profitability, lower cost
per bowl and is an environmentally sound
approach to woodturning.
Professional wood-turner and instructor Larry
Walrath has cored hundreds of bowls using the
McNaughton Center Saver. Drawing on his years of
experience, Larry will be joining us for a
demonstration on bowl coring and nesting using
the McNaughton Center Saver. He will show
step-by-step how to properly use the center
saver with efficiency and ease in all it's
applications.
Whether you already own a McNaughton Center
Saver system and want to improve your skills or
you're thinking of giving bowl coring a try,
come and enjoy the wet chips flying.
|
|
|
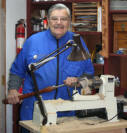
January
2009
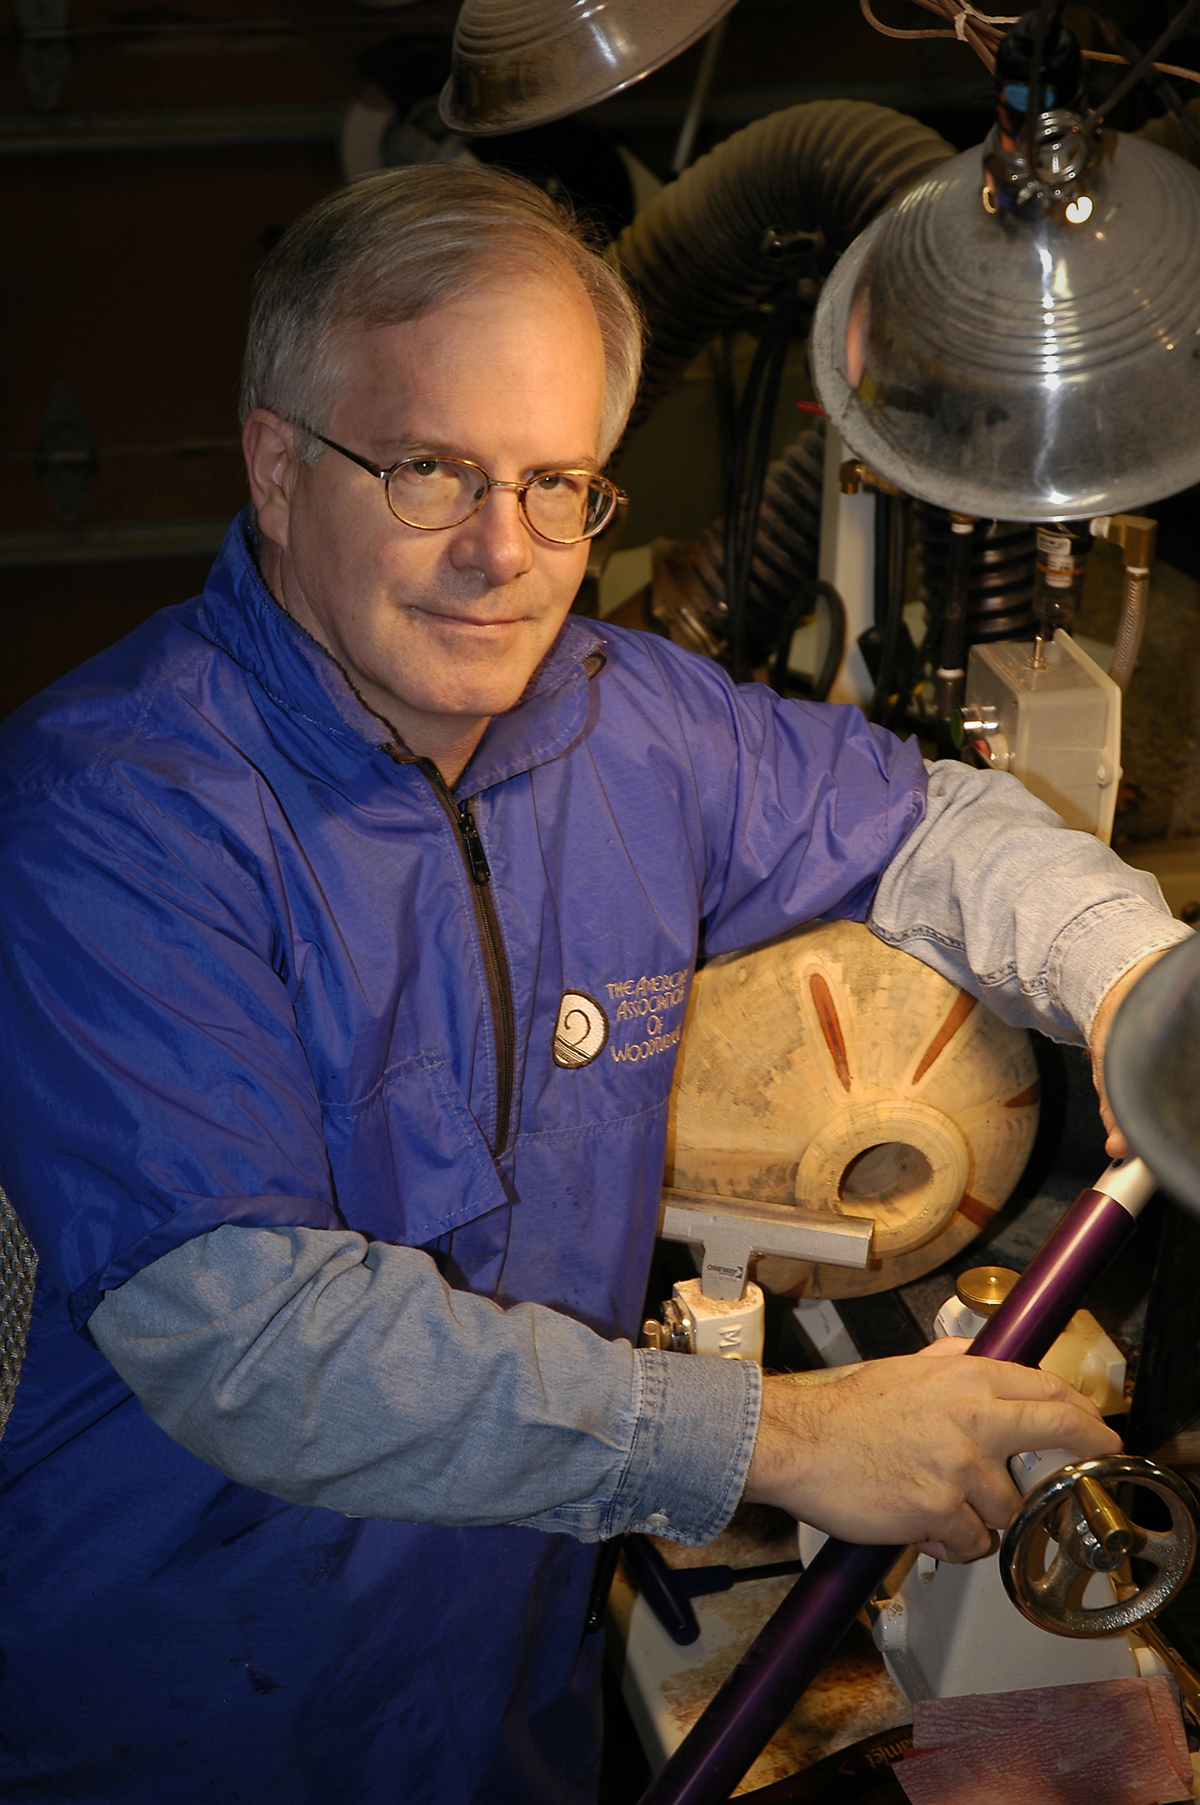
Steve Worchester
 I
started about 12 years ago like many others, turning
pens. Actually took a class at Woodcraft and spent
$1200 in the first week. Selling the pens at shows
paid for the first lathe and accessories. From
there, eventually I started doing faceplate work and
migrated towards square turning. My first article on
square turning was published in the AAW journal in
1999 and led to a 3 part series published early on
in Woodturning Design. I
started about 12 years ago like many others, turning
pens. Actually took a class at Woodcraft and spent
$1200 in the first week. Selling the pens at shows
paid for the first lathe and accessories. From
there, eventually I started doing faceplate work and
migrated towards square turning. My first article on
square turning was published in the AAW journal in
1999 and led to a 3 part series published early on
in Woodturning Design.
But how did I get to hollow forms?
My son and I attended our first AAW symposium in San
Antonio (1997), where we watched David Ellsworth
demo. After the demo, we walked up to a large crowd
standing around him chatting and David parted the
crowd to introduce himself to my then 12 year old
son. He stopped everything to introduce himself to
him! The next year I took a class from David at his
house. On a side note, if you ever have the
opportunity to take a class from someone of this
caliber, you will never regret it. Remember Clay
Foster is in your own backyard! As a turner, you
will grow leaps and bounds in a short period of
time. The learning curve shortens dramatically.
After working with his tools for some time, with
mixed results, I started to experiment more. Keep in
mind, I am OCD and a computer field engineer by
trade. These traits have molded me into a turner who
looks at everything as a step towards the end (the
never ending end). I look at each task methodically
as how I would be able to communicate it to someone
else as if I were writing an article or demoing the
technique. OK, so sometimes I have a communication
failure.
The evolutions of the tools for hollow turning have
come quite a long way. From the invention of the
tooling (in modern days anyway) with David
Ellsworth’s hand held tools to the start of the
captive turning with Hugh McKay’s articulated tool
to the current version of the Jamieson and lower
cost captive bars. Several articulated systems have
been introduced like the Kobra and the ELBO to name
a few. Also of mention are the arm rest type tool
holders from John Jordan, Sorby, which evolved from
the Stewart system. These are just the tool holders,
then you have the bits and lasers and wall
measurement devices.
Keep in mind, these are just the vehicle. Any of
those, properly utilized can hollow out a vessel.
However an ugly hollow vessel, no matter how thin
the walls are, how beautiful the wood is, is still
ugly. It doesn’t have to be light weight, but it
must be visually light, it must have pleasing curves
that flow and look intentional. As with all
woodturning, everything must look intentional. The
cuts must be clean, and cut with a gouge. Sandpaper
is not a cutting tool!
But we may be getting ahead of ourselves here. My
intent is to demonstrate to you my particular method
of hollowing, taught by or influenced by my years of
reading, being taught, and experimenting. My style
of demonstrating and teaching is very light hearted,
it shouldn’t be hard, let’s not make it that way. I
try to put as much humor into the event and teach
you how I got there, and have fun. If you don’t have
fun and learn from your mistakes you will not
progress. Each mistake, each piece you blow the
walls through, isn’t a mistake, it is a progress
towards the end result. Once you hit that result,
you perfect it and then some more.
 This
is how I got to adding glass to my work as well as
bleaching, burning, dyes and paints. Sure, the
embellished work isn’t for everyone; some are
purists some are extremists. The lathe to me is just
a tool to assist in the end result. What I do is
turn a small hemisphere with a rounded top, during
the process I make a vacuum form mold, then hollow
out the inside. After the form is manipulated
(bleached, nothing like a white canvas to start
with, airbrushed maybe, dyed, etc., if need be) it
is shot with automotive clear coat urethanes, sanded
and buffed (the good custom painters don’t need to
buff, yet another learning curve). The mold is used
to give me a plane to form the glass on as it is
filled with high temperature “plaster” and can be
used to kiln form the glass at up to 1400 degrees
Fahrenheit. (Yet another learning curve! Thanks God
for books and online forums to help). This
is how I got to adding glass to my work as well as
bleaching, burning, dyes and paints. Sure, the
embellished work isn’t for everyone; some are
purists some are extremists. The lathe to me is just
a tool to assist in the end result. What I do is
turn a small hemisphere with a rounded top, during
the process I make a vacuum form mold, then hollow
out the inside. After the form is manipulated
(bleached, nothing like a white canvas to start
with, airbrushed maybe, dyed, etc., if need be) it
is shot with automotive clear coat urethanes, sanded
and buffed (the good custom painters don’t need to
buff, yet another learning curve). The mold is used
to give me a plane to form the glass on as it is
filled with high temperature “plaster” and can be
used to kiln form the glass at up to 1400 degrees
Fahrenheit. (Yet another learning curve! Thanks God
for books and online forums to help).
The way I look at the above process, it is just a
start, as after each set is finished I think how I
could change or improve the next. Different wood,
dyes, glass patterns, and outside influences in your
everyday life that can alter your path.
Along the way, I was one of the founders of the
Dallas Area Woodturners and have been fortunate to
demonstrate at venues throughout the US, including
two AAW symposiums and the featured Texas turner at
SWAT. I am also a huge advocate of the AAW and the
administrator of the AAW forums. I hope that you
will come by and have some fun with us as we answer
questions you have about hollow turning and the
techniques I may show you and if nothing else,
expand your mind.
Did I mention that along the way, I started the
business and website, WWW.TURNINGWOOD.COM which is a
provider of premium sanding supplies and StickFast
glue? Like other things, helps pay for more wood and
glass. |
|
|
Previous Years Programs
|
|
|
2007-2008
Programs
For 2007-2008 demos
Click here
|
|
|
Links to
Archived Programs |
|
|
| |
|
|
|
Copyright © 2005, 2006 2007, 2008 Woodturners of North Texas
Last Updated
12/19/2009 |
|